
URP & HDRP Decals
The built-in Impact Decal component is very generic, and has no properties specific to any particular decal system. However, if you are using the URP or HDRP decal projectors included in the URP and HDRP render pipelines, you may want to leverage some of the features those decals provide. So, I have provided Impact Decal implementations for both the URP and HDRP decal projectors.
You can download the URP and HDRP Decal packages below.
URP and HDRP Version: 12.1.10+
URP and HDRP Decal Component
The URP and HDRP decals are replacements for the built-in Impact Decal, and are used in the exact same way. You can add them to a decal by going to or .
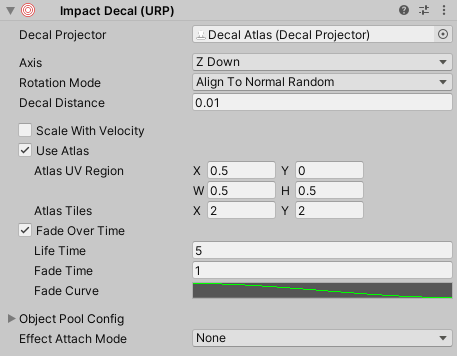
In addition to the properties found on the base Impact Decal, both URP and HDRP decals have the following properties:
- Decal Projector – The decal projector component attached to the decal.
- Use Atlas – Allows the decal to randomly select a region to display from an atlas texture.
- Atlas UV Region – The area of the texture to use, in UV coordinates.
- Atlas Tiles – The number of tiles in the X and Y directions.
- Fade Over Time – Allows the decal to fade away over time.
- Life Time – How long the decal will be alive before it begins to fade, in seconds.
- Fade Time – Once fading, how long the decal takes to fade away, in seconds.
- Fade Curve – Curve for controlling the opacity fade. This should be in the 0 to 1 range for both the X and Y axes.
If Use Atlas is enabled, the scene view will display some guides that will help you make sure your region is in the correct spot with the correct number of tiles.
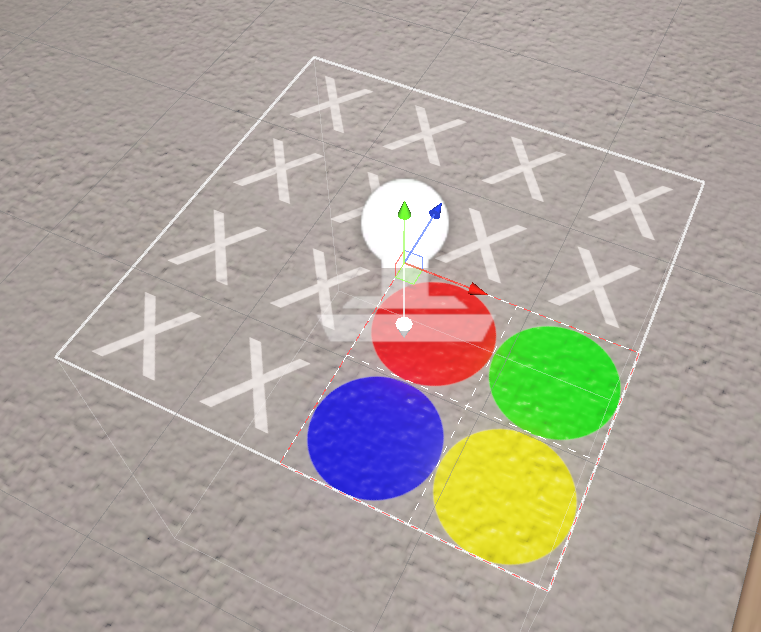
The red and white dashed line shows the border of the UV region, and the white dashed lines inside of the area show each tile.
So in this example, the decal will randomly select from the red, green, blue, and yellow circles.
Note that the material Tiling and Offset on the Decal Projector will be overridden when Use Atlas is enabled.