
Creating Space Skyboxes - Part 1
15 April 2022
Being set in the exotic reaches of fictional space allows Planetguard to have unique environments inspired by real phenomena in our universe. Perhaps the most visually dazzling phenomena in space are nebulas, huge congregations of dust and gases making up beautiful cosmic structures. It would certainly be a missed opportunity to not include these in the environments of Planetguard. In this dev blog, I'll walk through the process of creating space skyboxes with stars and nebulas.

As a disclaimer, this is not necessarily a realistic depiction of a nebula. Many nebulas are very dim and are difficult to see with the naked eye, with photos of them typically taken with very long exposure times. On top of that, some of the more spectacularly colored images of nebulas are taken in false color, and do not represent the "true" color as our eyes would see it.
With that said however, I am making a game, and games are supposed to look cool. So, realism can be set aside in favor of impressive visuals.
Creating Background Stars with a World Shader
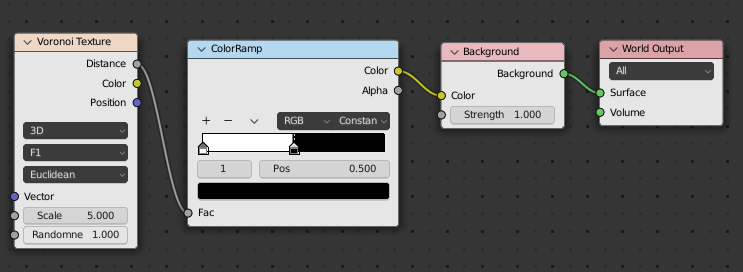
First, let's start with the easy part and create the thousands of stars that will be in the background. We can accomplish this with a relatively simple World shader that uses Voronoi noise. When fed into a color ramp, a Voronoi texture can be used to make random circles.

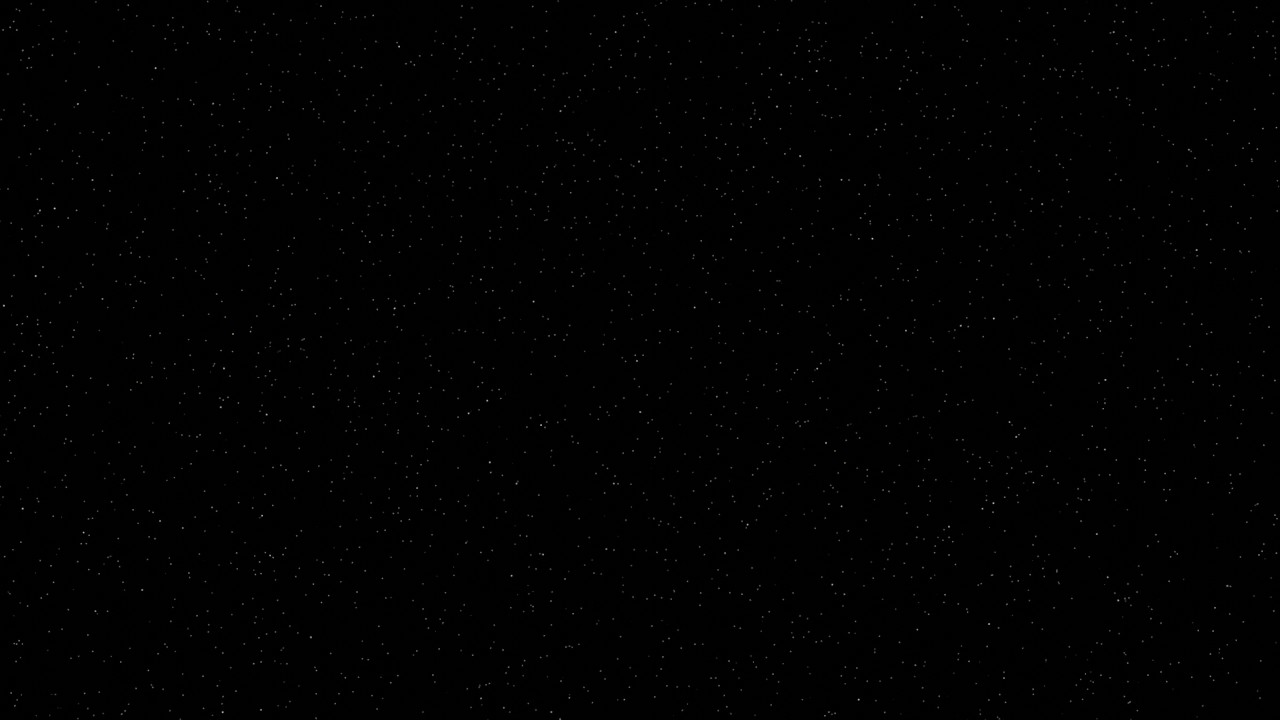
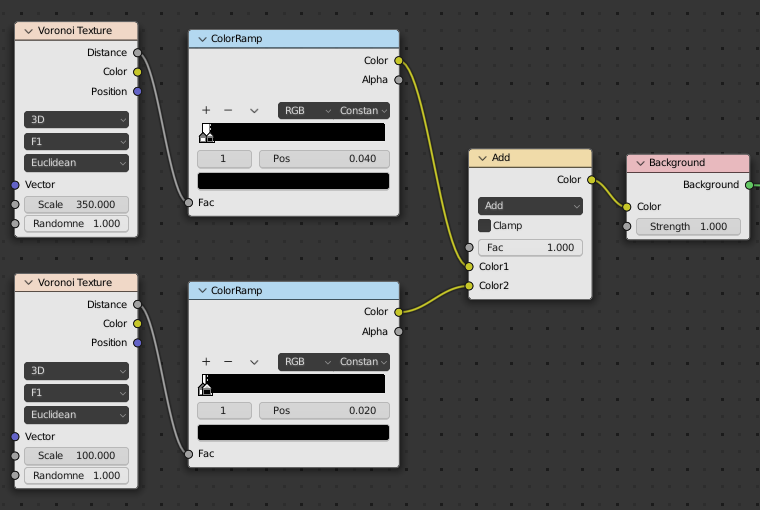
By increasing the scale of the Voronoi texture and adjusting the color ramp, we can turn these circles into many small points. You can even add multiple Voronoi textures together for more variation in point sizes.
Creating Nebulae with Volumetrics
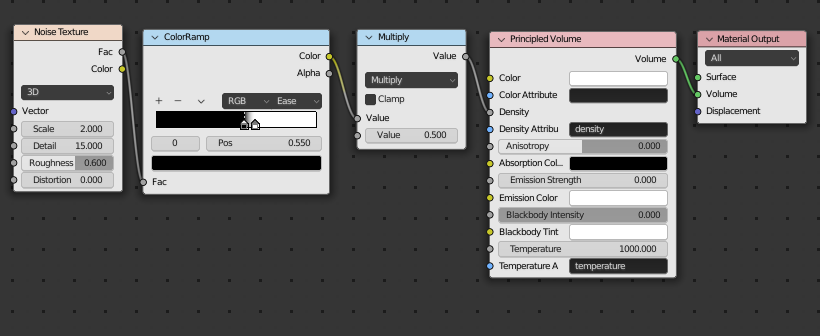
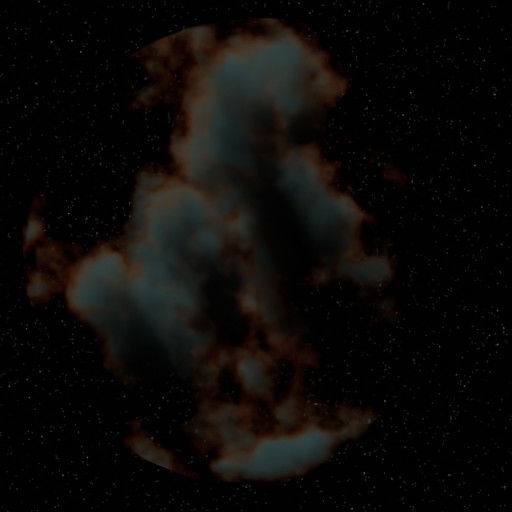
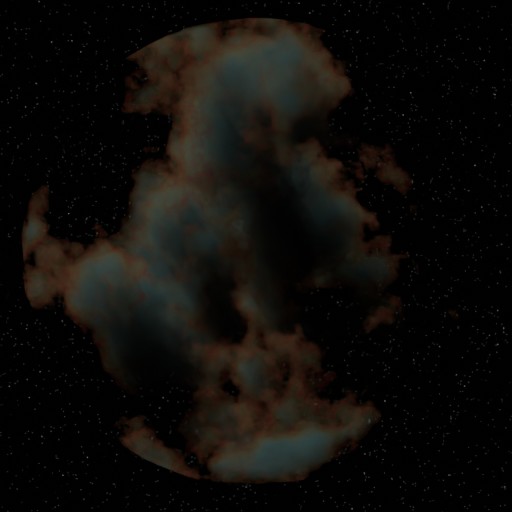
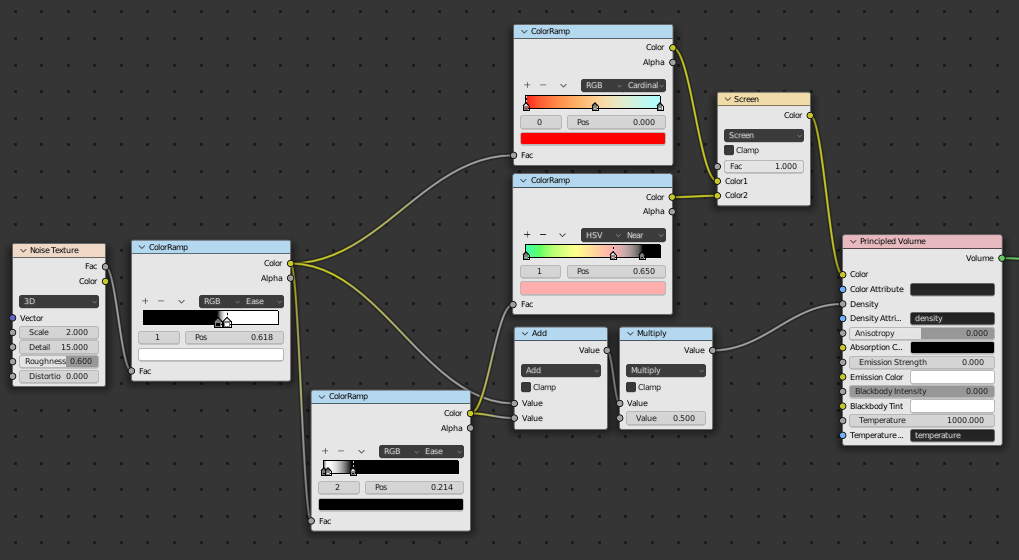
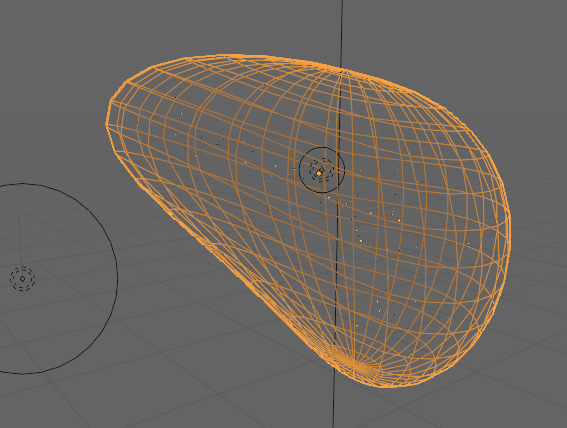
Now we can begin creating the nebula clouds. First, we need an object to apply our volumetric material to. Any object can be used, and in my case I will be using a sphere. Next, the basic setup for material is to feed a Noise Texture into the Density input of a Principled Volume shader. Color Ramp and Multiply nodes can be added to control the contrast and density of the clouds. To better see what we are doing, I added a Sun light and am now looking at the nebula from the outside.
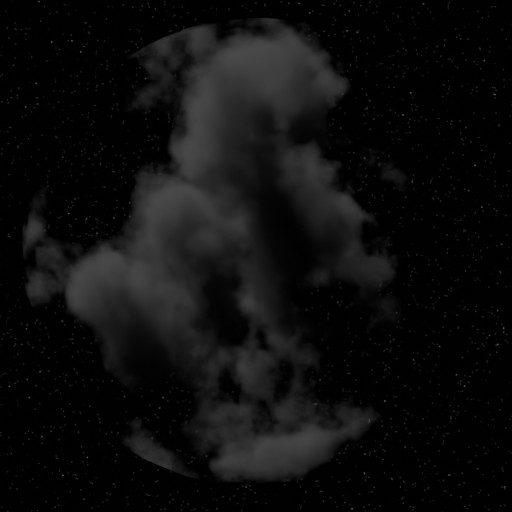
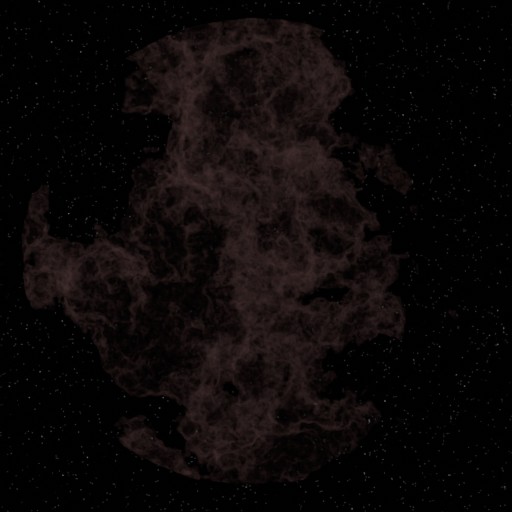
We don't need to worry about the hard edges around the sphere since we will be taking renders from inside. Now let's give our nebula some color. The simplest way to do this is to route our density into another Color Ramp, and then connect that to the Color input of the Principled Volume shader.
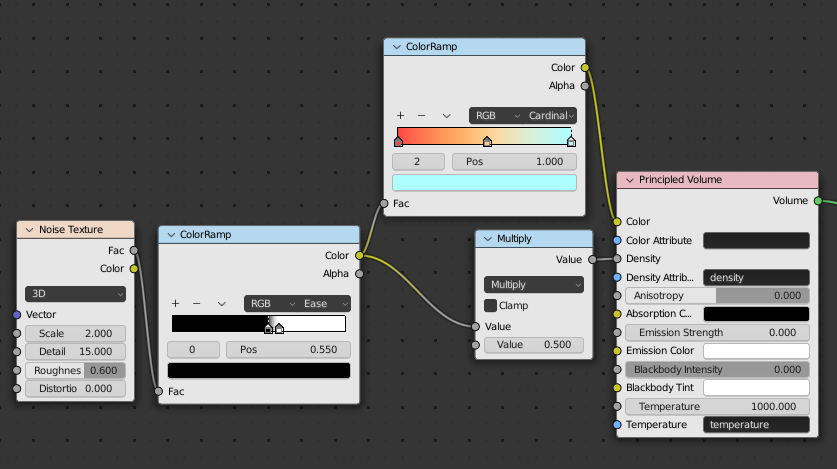
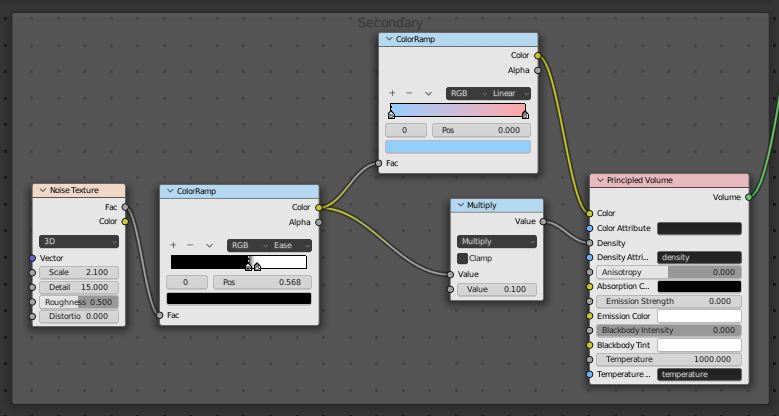
To add more detail to our nebula, we can use a secondary Color Ramp to create these interesting bands throughout the clouds.

Then, do some additional color mixing using this new Color Ramp.
Now let's turn our attention back to the inside of the nebula. Let's remove the sun light and replace it with several point lights scattered throughout the nebula clouds. These lights can have many different sizes, colors, and brightnesses. I am also continuously adjusting and refining the nebula shader to produce better results.
To add a little bit more of a soft glow to the nebula, we can add a secondary Principled Volume shader, made in much the same way as the primary shader.
Close Stars with Particle Systems
The final piece to add to our nebula is some closer stars, that is, stars that are inside of the nebula, as opposed to the far away background stars we created earlier. While you could manually place these stars, I like to use Particle Systems instead because it's less tedious.
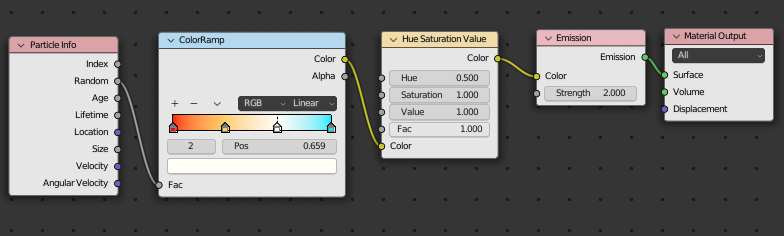
The first thing we need to do is create a star particle object and material. This can just be a simple Sphere or Icosphere. For the material, we can use the Particle Info to randomize the material for each particle. I simply used a color ramp to color the stars from red to orange, yellow, white and blue.
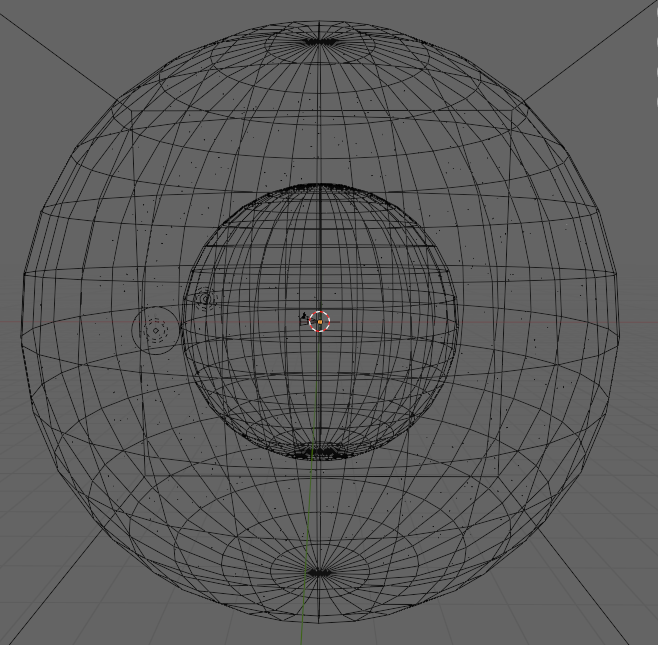
Next we need to create the Particle System itself. For the shape, I like to use a hollow sphere. I create a hollow sphere my making a new sphere object, duplicating it, scaling the duplicated sphere down, and flipping the normals. Making the sphere hollow ensures that the particles can't get too close to the camera.
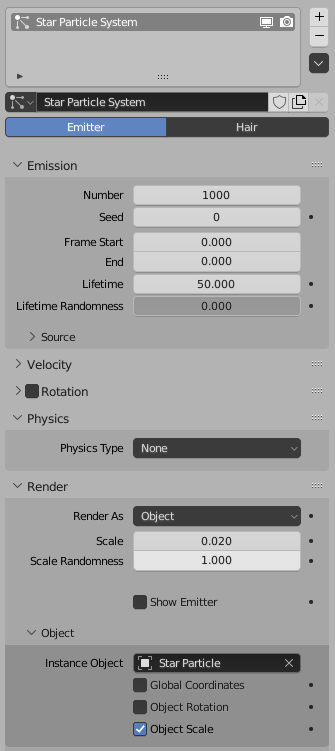
Now for the Particle System settings. Make sure that Physics is turned off so the particles don't use gravity. Also make sure that Show Emitter is unchecked for both Render and Viewport Display. I set the Frame Start and End to 0 so all of the particles spawn immediately.
The current particle system distributes stars evenly over the entire sphere. However, I would like to have some clusters of stars, particularly in some of the denser areas of the nebula cloud. We can do this by adding another smaller Particle System object and positioning it in our nebula cloud. The particle system settings can be copied from our previous particle system and adjusted for the smaller volume. The shape can also be deformed to fit in the cloud.
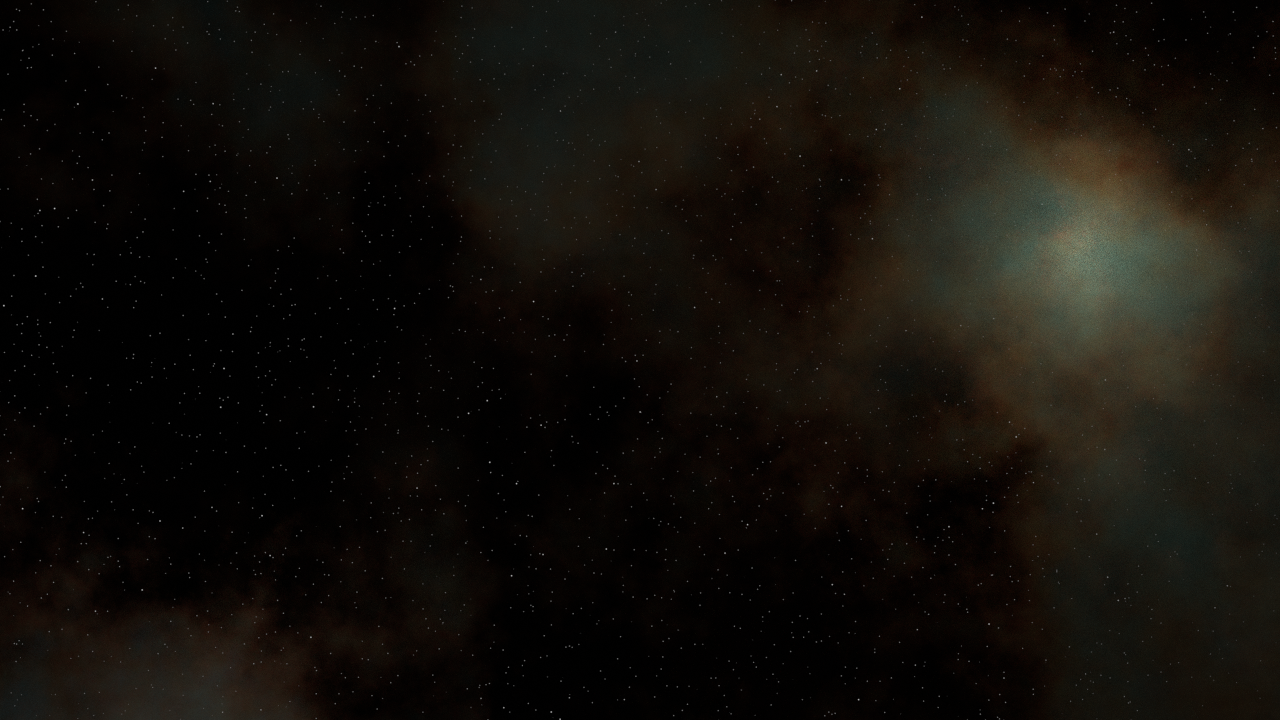
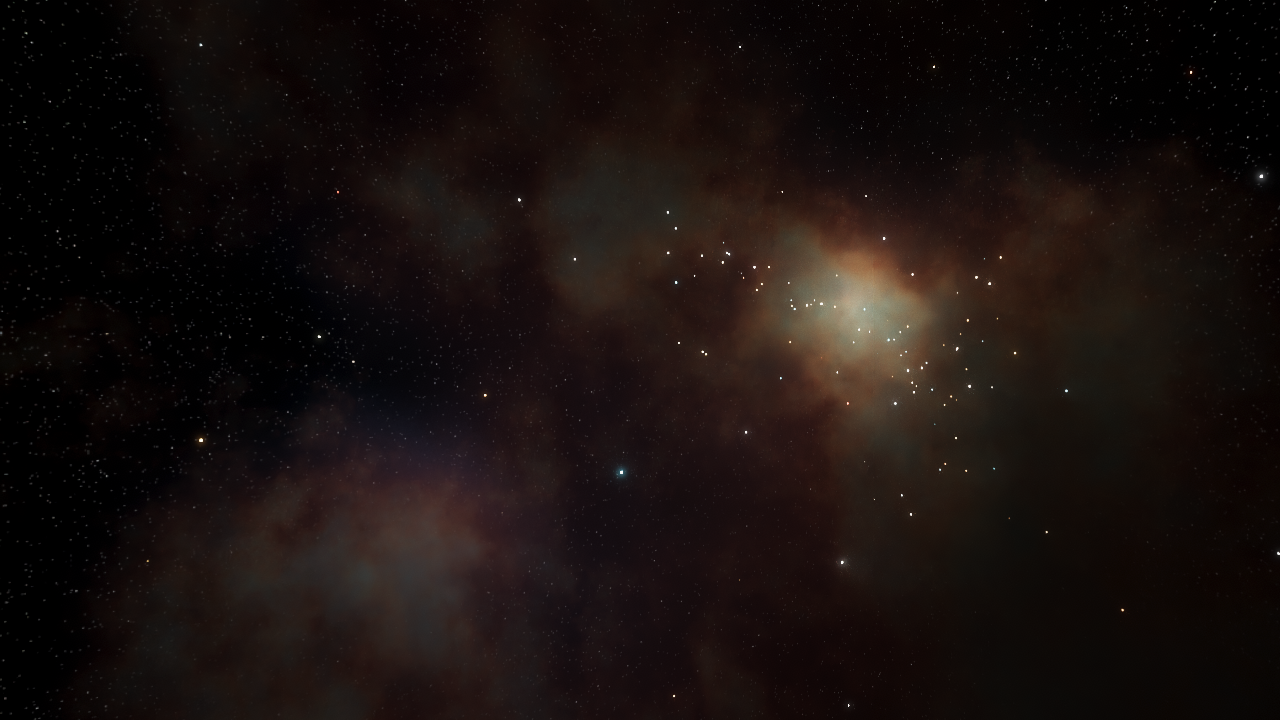
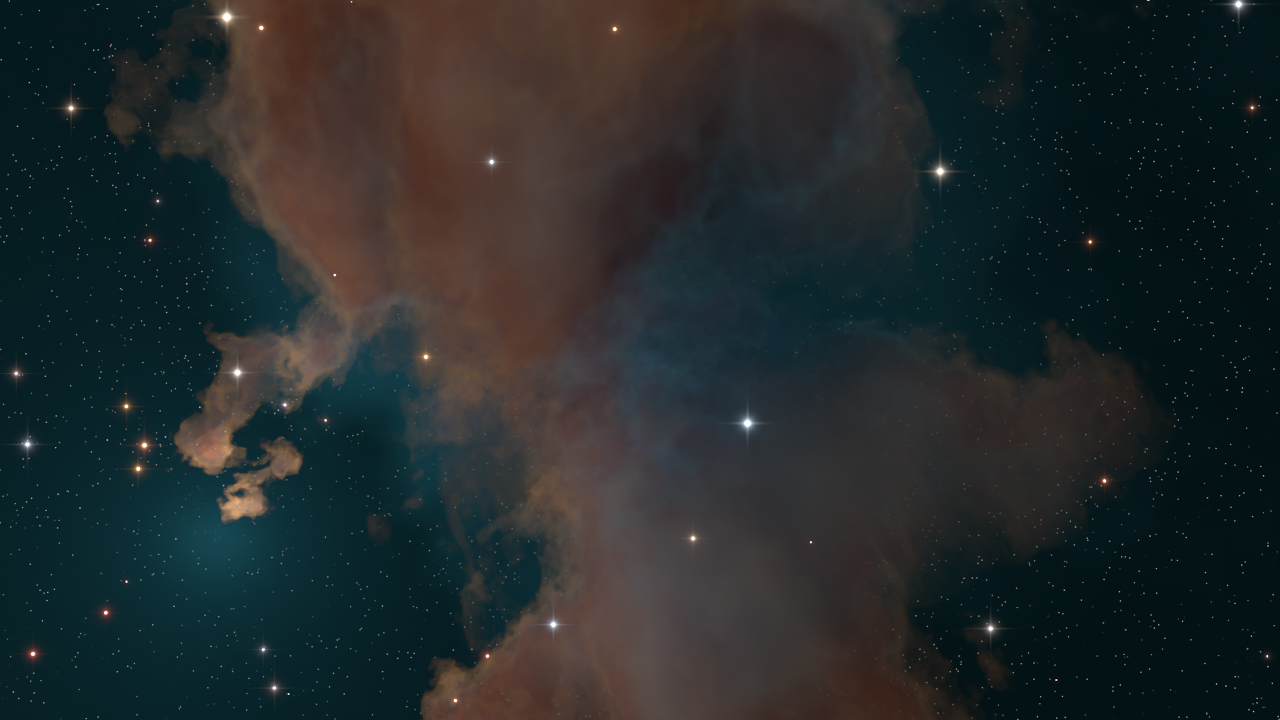
With all of that we get the final result (with some post processing to add Bloom/Glare).
Rendering to a Skybox
Since I am going to use this for a skybox in a game engine, I will need to render the skybox textures. I prefer rendering out 6 textures for a cubemap, since this produces the least amount of distortion. To do this we will need to set up a camera to render the 6 sides. The camera should be positioned at the origin, and have a field of view of 90 degrees.

While we could manually render each side and rotate the camera ourselves, it is much easier to create an animation for the camera and render an image sequence. So, we need to create an Action for our camera. This action consists of only 6 frames, one for each side of the skybox. The order of the faces and the rotation of the camera at each face is dependent on your game engine. I am using the order: Front, Back, Left, Right, Up, Down.
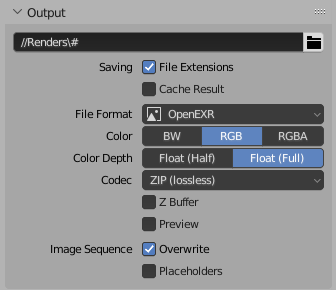
In your Output properties, make sure you are using an Image format as your output. In many cases you will want a format that can handle HDR (High Dyanmic Range), such as OpenEXR or Radiance HDR. This will allow for Bloom effects to take advantage of the bright stars in the skybox.
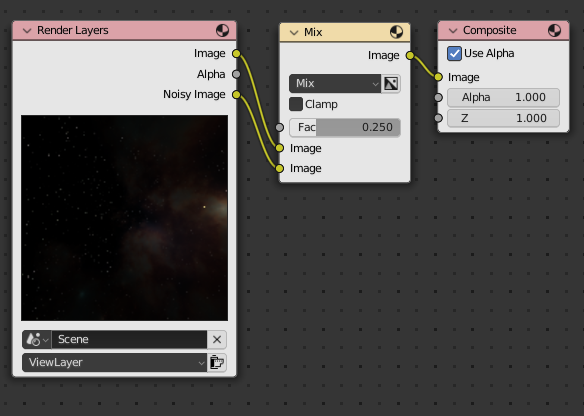
Dealing with noise in the rendered skybox can be difficult. Denoising can have inconsitencies along the edges of each image, leading to seams. I've found that, while not a perfect solution, a good middle ground is to use the Compositor to blend between the noisy and denoised image.
Now we are ready to render the animation. Each side of the skybox will be saved to a separate file, which may need to be combined into a single texture depending on the game engine.
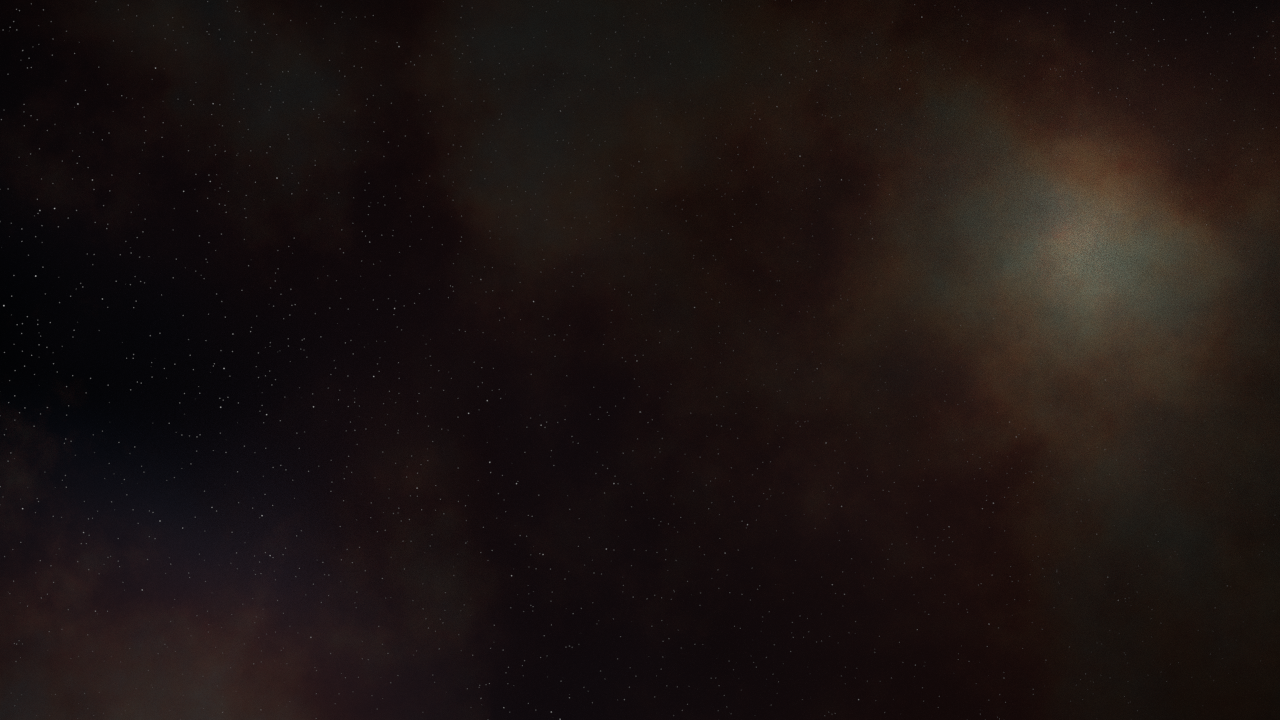
Skybox as viewed in Unity (HDRP)
This nebula is relatively simple, however these concepts and ideas can be expanded upon to create much more complex nebulas of all shapes and sizes. Experimentation is key!
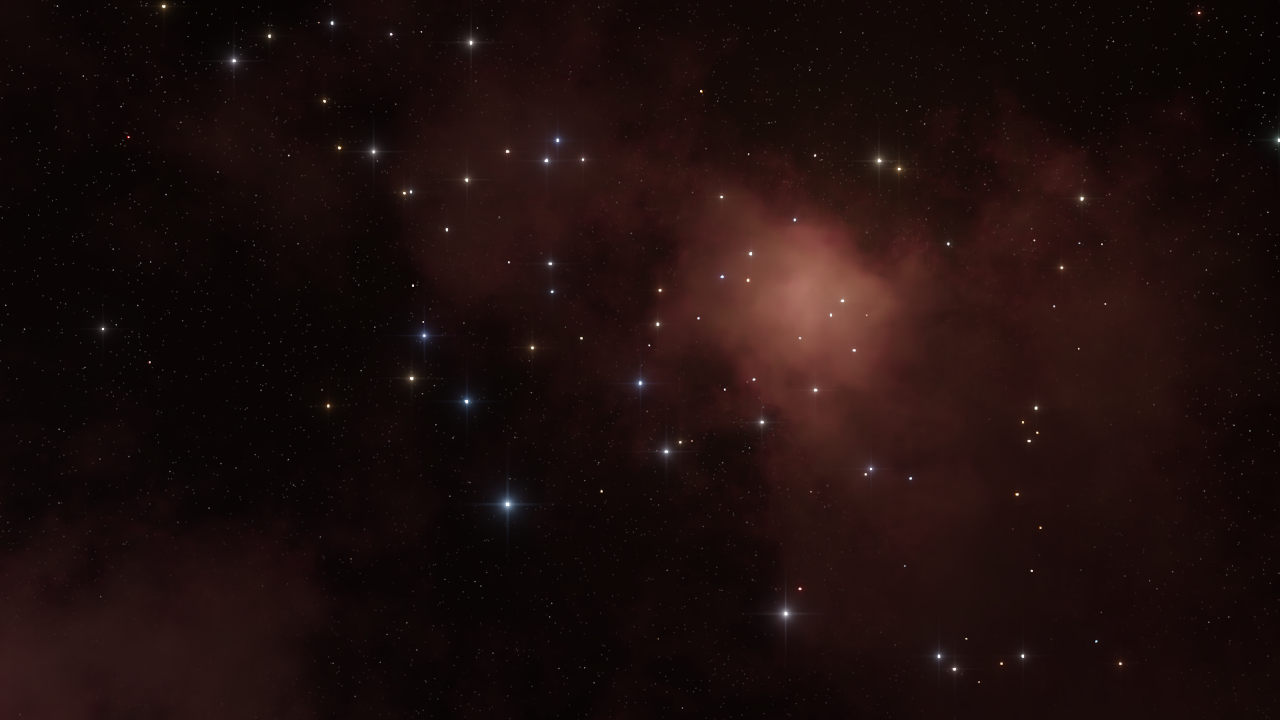
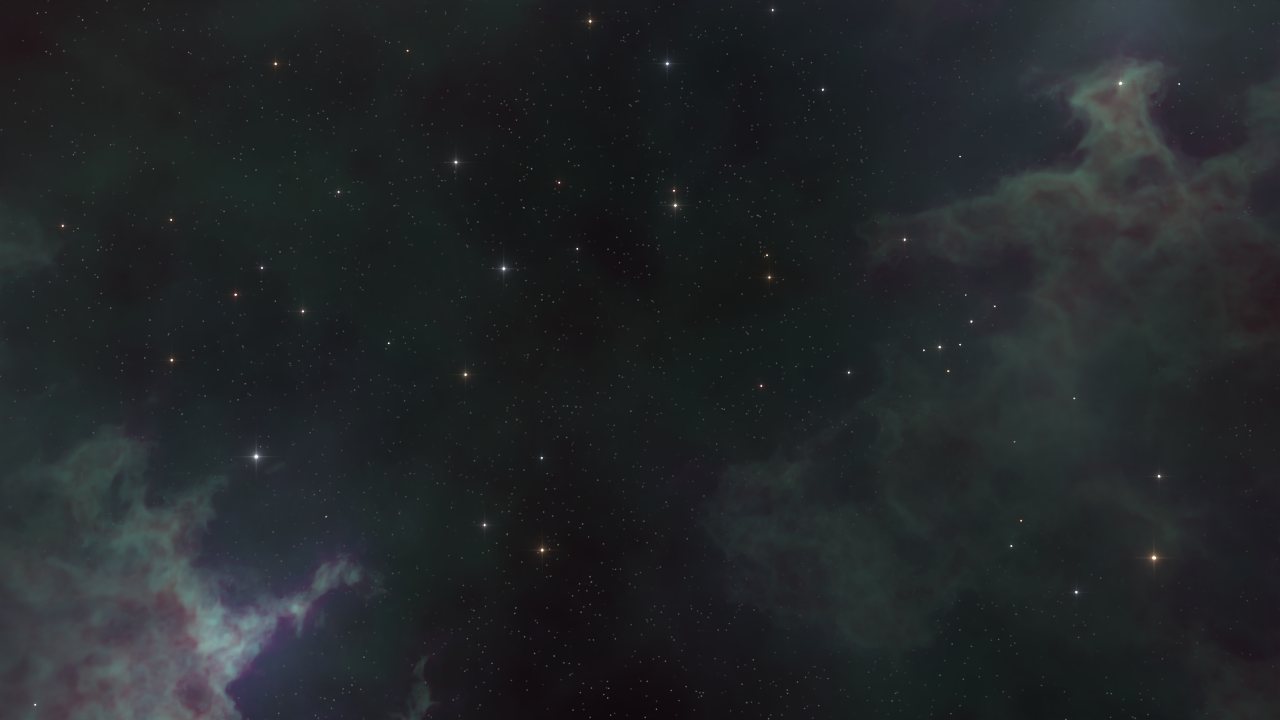
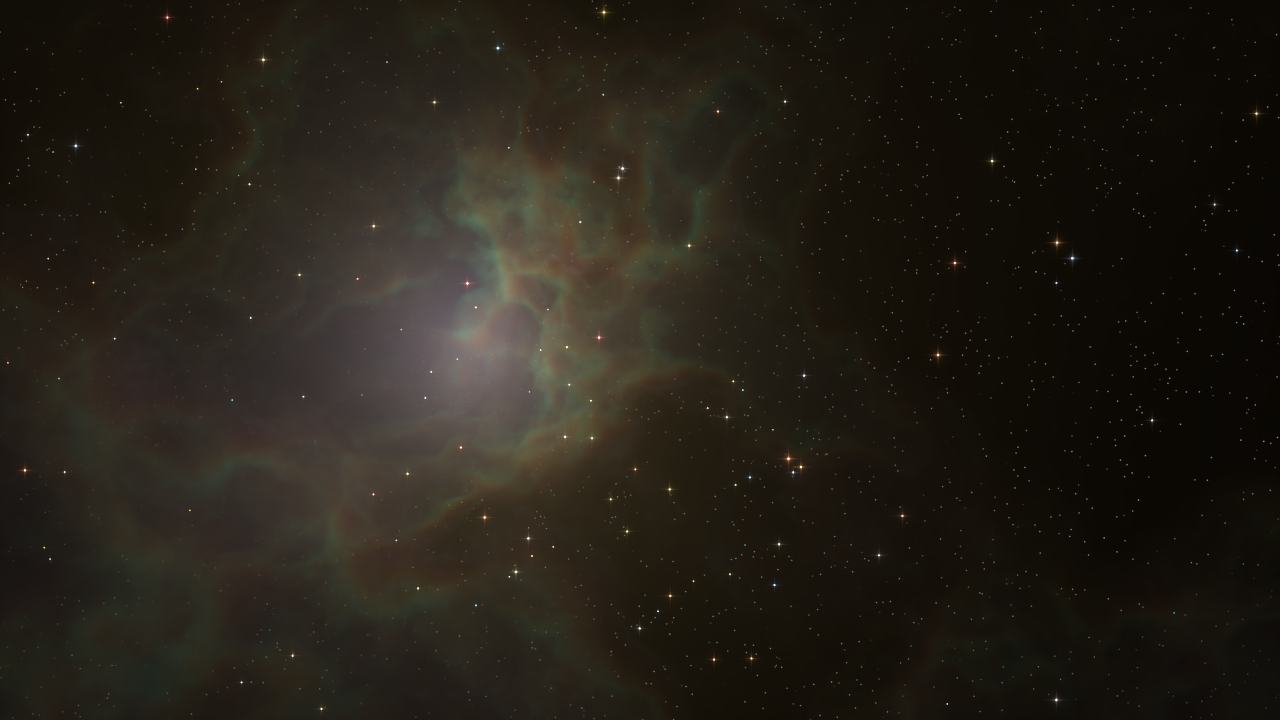
Use the link below to download the source .blend files. This includes the nebula created in this blog as well as the other nebulas shown above (4 nebulas in total). You can also download the skyboxes from the Unity Asset Store!
In Part 2 of this blog, I will go through how to make skyboxes for the surfaces of planets, including how to make atmospheres and clouds, so stay tuned!